AI-Powered Contract Drafting Guide: How to Streamline Contracts with QuickSign
Streamline legal workflows with this AI-powered contract drafting guide. Learn how QuickSign speeds up contract creation, reduces errors, and boosts compliance.

AI-Powered Contract Drafting Guide: How to Streamline Contracts with QuickSign
AI is transforming how businesses create, negotiate, and sign contracts. Legal teams and business owners are using generative AI to draft agreements faster, reduce admin time, and minimize routine legal bottlenecks. Gartner recently identified contract drafting, review, and risk analysis as some of the highest-value use cases for generative AI in legal departments, especially for accelerating deal cycles and improving contract visibility.(gartner.com)
This guide shows you, step by step, how to use the AI-powered contract drafting capabilities built directly into QuickSign—and then send those contracts for secure e‑signature in under 60 seconds.
Why AI-Powered Contract Drafting Matters in 2025
Generative AI is now widely used to:
- Draft first versions of contracts and NDAs from plain-language prompts
- Summarize long legal documents for faster review(gartner.com)
- Flag non‑standard clauses and risks in incoming contracts(arxiv.org)
At the same time, courts and bar associations are warning that AI-generated legal content must always be checked for accuracy and legal compliance—especially to avoid “hallucinated” case law or incorrect legal conclusions.(reuters.com)
Key principle: AI should draft and accelerate your contracts; qualified humans must review and approve them.
QuickSign is built for this exact balance: fast AI document generation plus a simple, auditable signing workflow that keeps humans in control.
What You’ll Learn in This Guide
In this step‑by‑step tutorial, you’ll learn how to:
- Use QuickSign’s AI Document Generation to create contract drafts from scratch
- Custo
mize AI‑generated clauses to match your business policies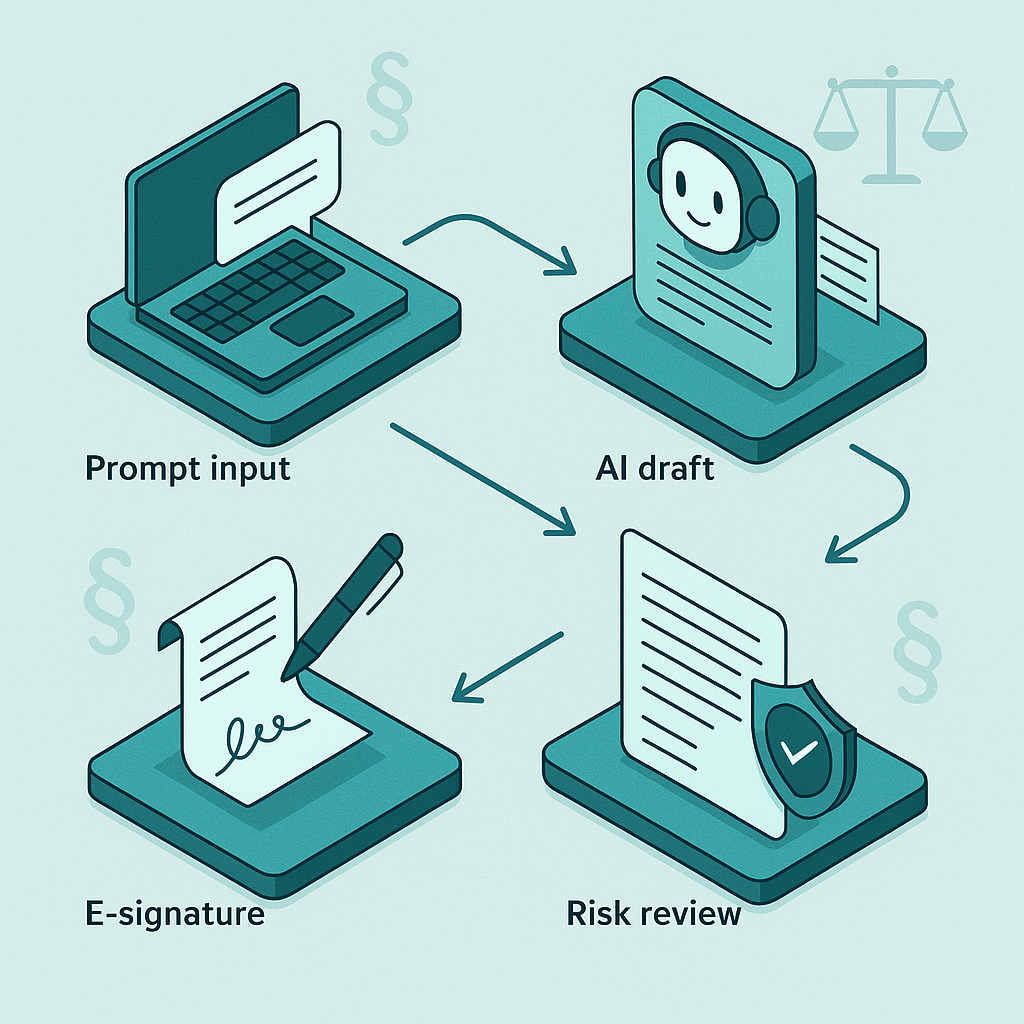
- Prepare contracts for e‑signature with drag‑and‑drop fields
- Send, track, and manage signed contracts centrally
- Apply AI drafting best practices to stay safe and compliant
What You’ll Need
- A QuickSign account (free or paid) – sign up at https://quicksign.it
- Your basic contract requirements (e.g., parties, scope of work, payment terms)
- 5–10 minutes for your first draft (subsequent contracts typically take under 60 seconds with saved prompts and templates)
Good to know: With the free tier of QuickSign, you can generate 2 AI documents and send 1 document to unlimited recipients—no credit card required.
Step 1: Create Your QuickSign Account
1.1 Sign Up at QuickSign.it
To start drafting contracts with AI, you’ll first create your workspace:
- Go to https://quicksign.it in your browser.
- Click the “Get Started Free” or “Sign Up” button on the homepage.
- Enter your work email, name, and a secure password.
- Confirm your email if prompted (check your inbox and spam folder).
1.2 Set Up Your Organization
Once you’re in the dashboard:
- Fill in your Organization Name (e.g., “Acme Consulting LLC”).
- Optionally invite team members using their email addresses.
- Confirm your default country/region so your contracts reflect appropriate legal conventions (currency, jurisdiction references, etc.).
Pro tip: Because QuickSign uses flat‑rate pricing (from $15/month for your whole team), you can safely invite colleagues without worrying about per‑seat costs.
Step 2: Define the Contract You Need
Before you click any AI button, get clear on what you’re drafting. This will dramatically improve the quality of the AI output.
2.1 Choose Your Contract Type
Typical use cases for QuickSign’s AI Document Generation include:
- Non‑Disclosure Agreements (one‑way or mutual)
- Service Agreements / MSAs
- Freelancer or Contractor Agreements
- Sales or Subscription Agreements
- Employment or Offer Letters (coordinate with HR/legal)
2.2 Gather Key Inputs
For best AI results, prepare the following:
- Parties: Legal names and addresses of both sides
- Scope: What is being provided (services, deliverables, access)
- Commercial terms: Price, currency, payment schedule, late fees
- Timeline: Start date, initial term, renewal/termination rules
- Risk & compliance: Confidentiality, IP ownership, liability caps, governing law
Pro tip: The more specific your description, the less editing you’ll need later. Treat your AI prompt like a clear set of instructions to a junior lawyer or contract manager.
Step 3: Generate a Contract Draft with QuickSign’s AI
Now you’re ready to let QuickSign’s AI create your first draft from scratch.
3.1 Open the AI Document Generation Tool
From your QuickSign dashboard:
- Click the “Generate Document” button in the main navigation or dashboard tiles.
- Select “Create with AI” if prompted to choose between upload and generation.
3.2 Describe the Contract in Plain Language
You’ll see a large text area labeled something like “Describe the document you need”. This is where you enter your instructions.
Example prompt for a mutual NDA:
“Draft a mutual non‑disclosure agreement between Acme Consulting LLC (a Delaware company) and BrightFuture Labs Inc (a California company). Purpose: evaluating a potential software integration partnership. Include standard confidentiality, non‑use, and non‑circumvention clauses, 3‑year confidentiality term from date of disclosure, Delaware law, and exclusive jurisdiction in Delaware state courts. Limit liability to direct damages only.”
Then:
- Paste or type your description into the box.
- Optionally choose a document type from a dropdown (e.g., “NDA”, “Service Agreement”) if QuickSign presents presets—this helps shape the structure.
- Click “Generate Draft”.
The AI generation typically takes a few seconds. For common contracts like NDAs or service agreements, you’ll get a structured, multi‑clause contract ready for review.
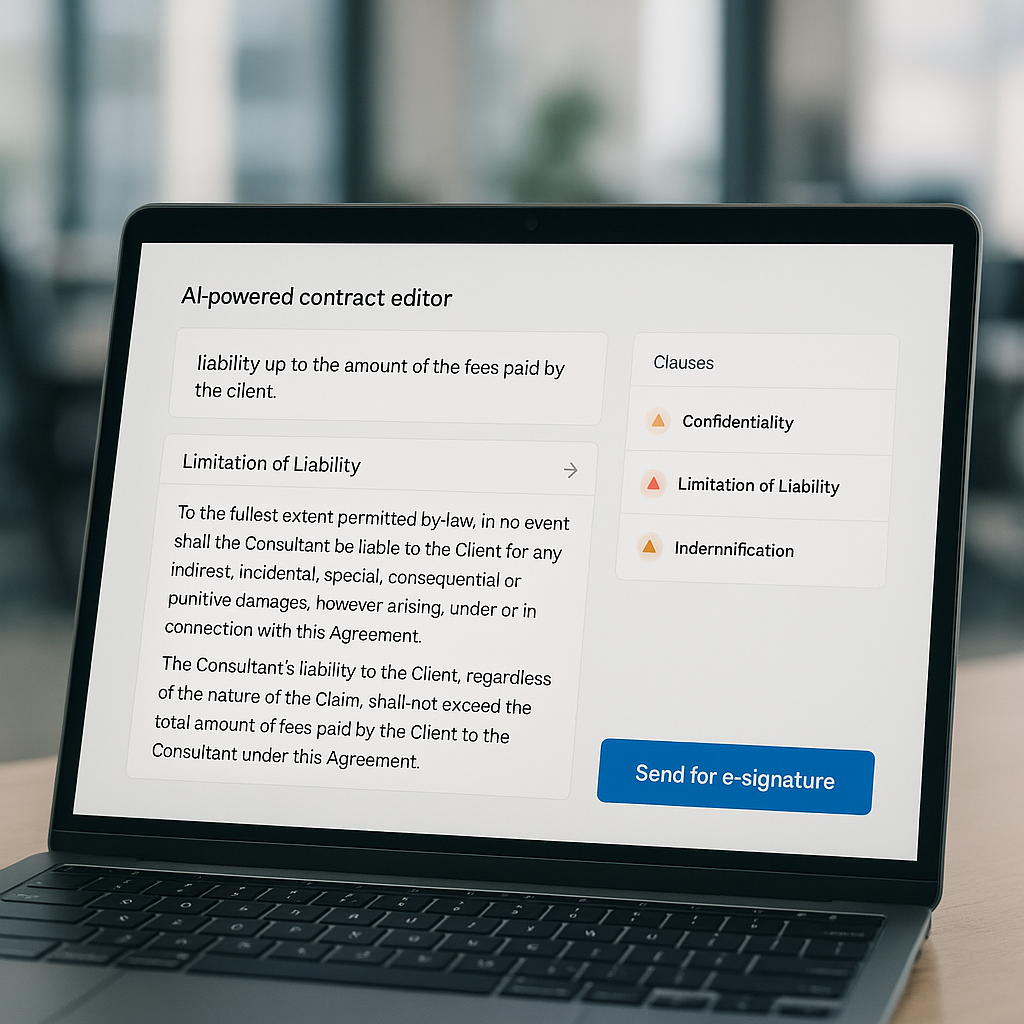
3.3 Review the Generated Structure
QuickSign’s AI will produce a document with familiar legal sections such as:
- Parties and Effective Date
- Definitions
- Confidentiality Obligations
- Intellectual Property
- Term and Termination
- Limitation of Liability
- Governing Law and Dispute Resolution
- Miscellaneous / Boilerplate
Important: AI can speed up drafting, but it does not replace a licensed attorney. Always have a qualified professional review high‑impact contracts before signing, especially for novel or high‑risk deals.(reuters.com)
Step 4: Customize and Refine Your AI Draft
4.1 Edit Directly in the QuickSign Editor
QuickSign presents the AI‑generated contract in an inline editor:
- Use your cursor to click into any clause.
- Edit text just like you would in a word processor (add, remove, or rephrase language).
- Use formatting controls (bold, numbered lists, headings) in the editor toolbar for clarity.
Example refinements you might make:
- Tighten the Scope of Confidential Information to exclude information already public.
- Adjust the liability cap (e.g., “fees paid in the last 12 months”).
- Align the governing law and venue with your internal legal playbook.
4.2 Use AI to Rephrase or Extend Clauses (Optional)
Some AI contract tools now support contextual clause editing; research shows this is a top‑value use case because it reduces manual re‑drafting and helps standardize language across contracts.(gartner.com) If QuickSign presents options like “Improve this clause” or “Make this more concise” when you highlight text:
- Select the clause you want to adjust.
- Click an AI action such as “Shorten” or “Clarify”.
- Preview the suggested text and either “Accept” or “Revert”.
Pro tip: Save clauses you like as internal standards. Over time, your organization builds a consistent library of AI‑ready playbook language across all QuickSign contracts.
4.3 Save as a Template for Future Use
Once you have a version your legal team approves:
- Click “Save as Template” in the editor menu.
- Name it clearly (e.g., “Mutual NDA – Standard (US)”).
- Set visibility to “Team” so colleagues can reuse it.
Next time, you can create a new NDA in seconds by selecting this template and only updating party names and business details.
Step 5: Prepare the Contract for E‑Signature
Once the language is locked, you’re ready to collect signatures. This is where QuickSign’s drag‑and‑drop interface shines.
5.1 Convert Your Draft into a Signable Document
From the editor:
- Click “Prepare for Signature”.
- QuickSign will generate a signable version of the contract (typically as a PDF‑style layout).
5.2 Add Signature and Form Fields with Drag and Drop
You’ll land in the field placement view, where you can visually configure where each party signs.
- On the right sidebar, you’ll see elements like Signature, Initials, Date, and Text fields.
- Drag a Signature field onto the signature line for Party 1.
- Assign it to the correct signer via the Recipient dropdown (e.g., “Client” or “Vendor”).
- Repeat for Party 2 (and any additional signers).
- Add Date fields next to each signature line if not auto‑inserted.
- Use Text fields where signers need to fill in details (e.g., full name, title, PO number).
Pro tip: If you already have a standard PDF contract from your legal team, you can skip AI generation and instead click “Upload PDF” in QuickSign, then use the same drag‑and‑drop tools to make it signable.
Step 6: Add Recipients and Send for Signature
6.1 Configure Recipients
When your fields are in place, click “Next” or “Send” (depending on UI). On the recipient setup screen:
- Enter each signer’s name and email address.
- Optionally add CC recipients who should receive a copy but don’t sign (e.g., finance or legal ops).
- Set the signing order if you need sequential signatures (e.g., first Client, then your internal approver).
6.2 Customize the Email Message
In the message area:
- Set a clear Subject (e.g., “Please sign: Mutual NDA for Partnership Discussion”).
- Write a short message explaining the purpose and any deadline (e.g., “Hi Jane, here is our standard NDA so we can share technical details. Please sign by Friday, January 9.”).
6.3 Send the Document (Under 60 Seconds)
Once everything looks good:
- Review the summary screen (recipients, fields, document preview).
- Click “Send for Signature”.
Because QuickSign is optimized for speed, this entire “prepare and send” flow—from finished draft to outbound signature request—can typically be completed in under 60 seconds, especially when you reuse templates.
Step 7: Track Views, Signatures, and Completed Contracts
Modern e‑signature platforms are not just about signatures; visibility and audit trails are critical for compliance and deal velocity.(ironcladapp.com)
7.1 Monitor Real‑Time Status
From the Documents or Activity tab in QuickSign:
- Locate your contract by name, recipient, or date.
- See its status at a glance: Sent, Viewed, Signed, or Completed.
- Open the activity log to see timestamps for when each recipient:
- Opened the email
- Viewed the document
- Completed their signature
7.2 Send Reminders
If a contract is stuck waiting on someone:
- Click into the document.
- Use the “Send Reminder” button to nudge specific signers.
- Optionally add a personalized note (e.g., “Just a reminder that we’re targeting a start date of Feb 1.”).
7.3 Download or Share the Executed Contract
Once all parties sign:
- QuickSign marks the document as Completed.
- You can download a PDF copy that includes all signatures and the audit trail.
- Store it internally or link it back into your CRM, HRIS, or project management system.
Pro tip: Use consistent naming conventions (e.g., “ClientName – Agreement Type – Effective Date”) so your QuickSign document list doubles as a lightweight contract repository.
AI Contract Drafting Best Practices and Risk Management
Research and regulatory guidance emphasize that generative AI in legal work requires strong guardrails to protect confidentiality, privilege, and accuracy.(thetimes.com) Here’s how to apply those principles when drafting contracts with QuickSign.
8.1 Protect Confidential and Privileged Information
- Avoid pasting highly sensitive details (e.g., trade secrets, personal data) into general AI prompts; abstract where possible.
- Use internal templates in QuickSign for recurring contracts so you minimize exposure of confidential deal mechanics.
- Coordinate with your legal team on approved AI usage policies and data handling.
8.2 Always Conduct Human Legal Review
- Have internal counsel or external lawyers review AI‑generated contracts, especially for:
- Complex or high‑value agreements
- New jurisdictions or regulatory regimes
- Non‑standard liability or IP arrangements
- Verify that the contract language aligns with your company’s legal playbook and risk appetite.
8.3 Standardize and Iterate
- Turn well‑reviewed AI drafts into QuickSign templates so non‑legal teams can self‑serve safely.
- Collect feedback after each major deal cycle and adjust your prompts and templates.
- Keep a short internal guide of “approved prompts” for common contracts to ensure consistency across business units.
Real‑World Workflow Example: SaaS Vendor NDA & Service Agreement
Let’s bring this together with a concrete example of how a SaaS company might use QuickSign for a new customer engagement.
9.1 Draft a Mutual NDA with AI
- Sales initiates: opens QuickSign and clicks “Generate Document” → “Create with AI”.
- Uses a pre‑approved NDA prompt from the legal team, adjusting only party names and governing law if needed.
- Legal reviews, tweaks limitation of liability and governing law clauses, and saves the final as a team template.
9.2 Prepare for Signature and Send
- Sales rep clicks “Prepare for Signature”.
- Drags Signature and Date fields into place for both companies.
- Adds recipients (customer’s legal contact and internal signatory) and sends.
- Tracks views and signatures in the dashboard, sending one reminder after 48 hours.
9.3 Generate a Tailored Service Agreement
- Once the NDA is signed, the team uses QuickSign’s AI to generate a Subscription Services Agreement:
- Scope: access to a SaaS platform
- Term: 12‑month subscription, auto‑renewal
- Pricing: based on seats or usage tiers
- Security: reference to standard DPA and SOC 2 controls
- Legal refines IP, data protection, and SLAs, then saves this as another template for future deals.
- The contract is prepared for signature with drag‑and‑drop fields and sent to the customer directly from QuickSign.
Result: What previously took days of back‑and‑forth email and manual Word/PDF edits can now be initiated, drafted, and sent for signature in a single afternoon, with clear visibility into every step.
Helpful Video Resources on AI Contract Drafting
To deepen your understanding of AI in legal drafting and see complementary workflows, these videos are useful (they demonstrate general AI legal workflows that pair well with QuickSign’s signing capabilities):
AI Legal Tools and Workflows
Use these as conceptual guides, then centralize your final document execution and tracking in QuickSign.
Quick Summary
- Set up QuickSign: Create your account at QuickSign.it and configure your organization.
- Clarify your needs: Decide on contract type and prepare key business terms before you draft.
- Draft with AI: Click “Generate Document” → “Create with AI”, describe the contract, and let QuickSign’s AI produce a first draft.
- Refine the language: Edit clauses in the built‑in editor and convert strong drafts into reusable templates.
- Prepare for signature: Use drag‑and‑drop fields (Signatures, Dates, Text) to turn your contract into a signable document.
- Send in seconds: Add recipients, customize your message, and send—usually in under 60 seconds.
- Track everything: Use real‑time tracking in QuickSign to see who’s viewed, signed, and completed the contract.
- Stay safe: Protect confidentiality and always have important contracts reviewed by a legal professional.
Ready to simplify your document signing? Try QuickSign for free - generate 2 documents and send 1 document to unlimited recipients at no cost. No credit card required.