Drag and Drop Signature Placement Tutorial with QuickSign
Master e-signing with our drag and drop signature placement tutorial for QuickSign. Learn fast, sign smarter, and streamline every document in minutes.
Drag and Drop Signature Placement Tutorial with QuickSign
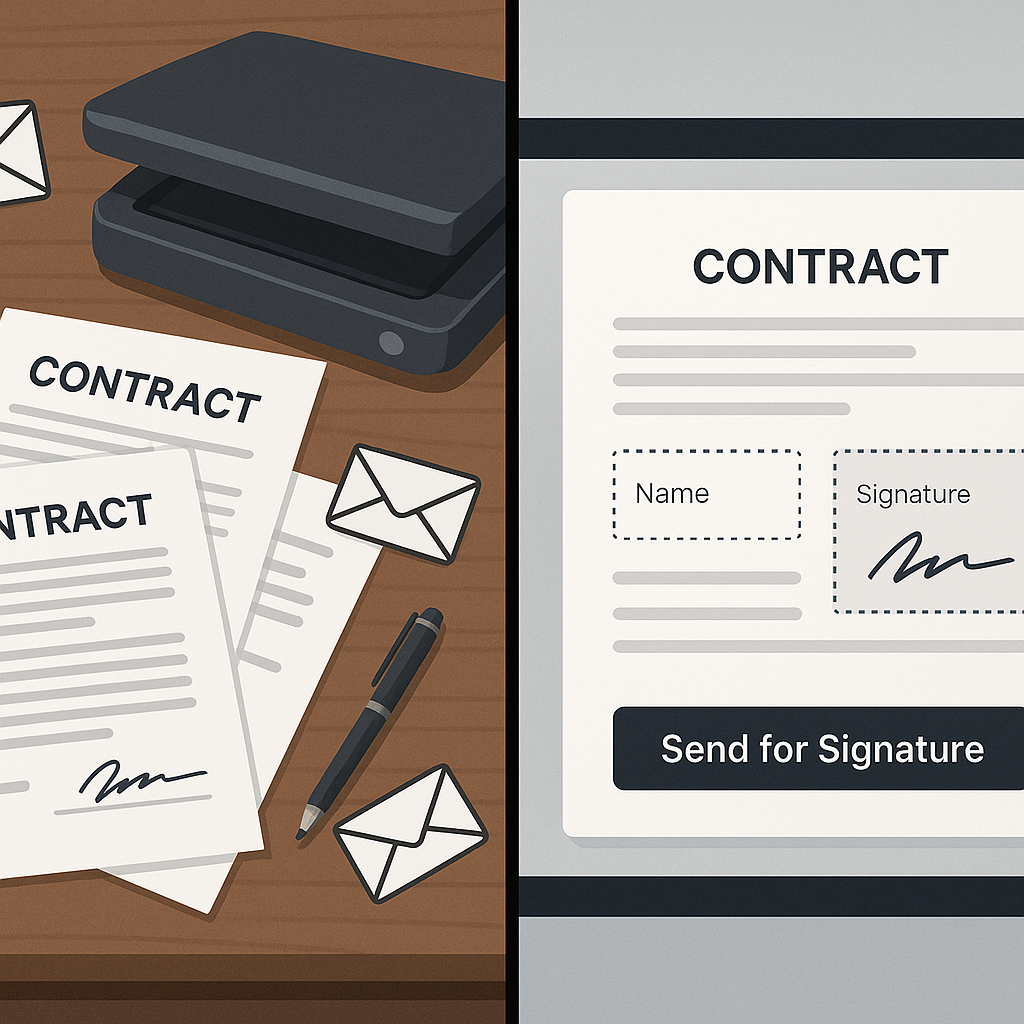
Manually printing, signing, scanning, and emailing contracts is not just slow—it’s a drag on your entire workflow. Modern e-signature tools solve this with intuitive drag-and-drop signature placement, so you can position fields exactly where you need them in seconds. With QuickSign, you can go from blank document to fully signable contract in under a minute, without wrestling with clunky editors or confusing menus.
This step-by-step tutorial will show you exactly how to use QuickSign’s drag-and-drop field placement to create clean, professional signing experiences for clients, partners, and employees.
Key idea: Drag-and-drop fields let you visually design where signatures, initials, dates, and text should go—reducing errors and significantly speeding up contract turnaround time compared to paper-based signatures, which can take days instead of minutes. (fujifilm.com)
What You’ll Learn
In this guide, you’ll learn how to:
- Quickly generate a contract from scratch using QuickSign’s AI Document Generation
- Upload your own PDF and prepare it for e-signature
- Use drag-and-drop to place signature, initials, date, and text fields precisely
- Assign fields to the correct recipients
- Send documents for signature and track status in real time
This entire workflow takes under 60 seconds once you’re familiar with QuickSign.
What You’ll Need
- A QuickSign account (free to start – includes 2 AI document generations and 1 document send to unlimited recipients)
- A document to sign:
- Either a PDF, Word, or image file you’ve already created, or
- A description of the agreement you want to generate with AI (e.g., “Mutual NDA between a marketing agency and a free
lance copywriter”)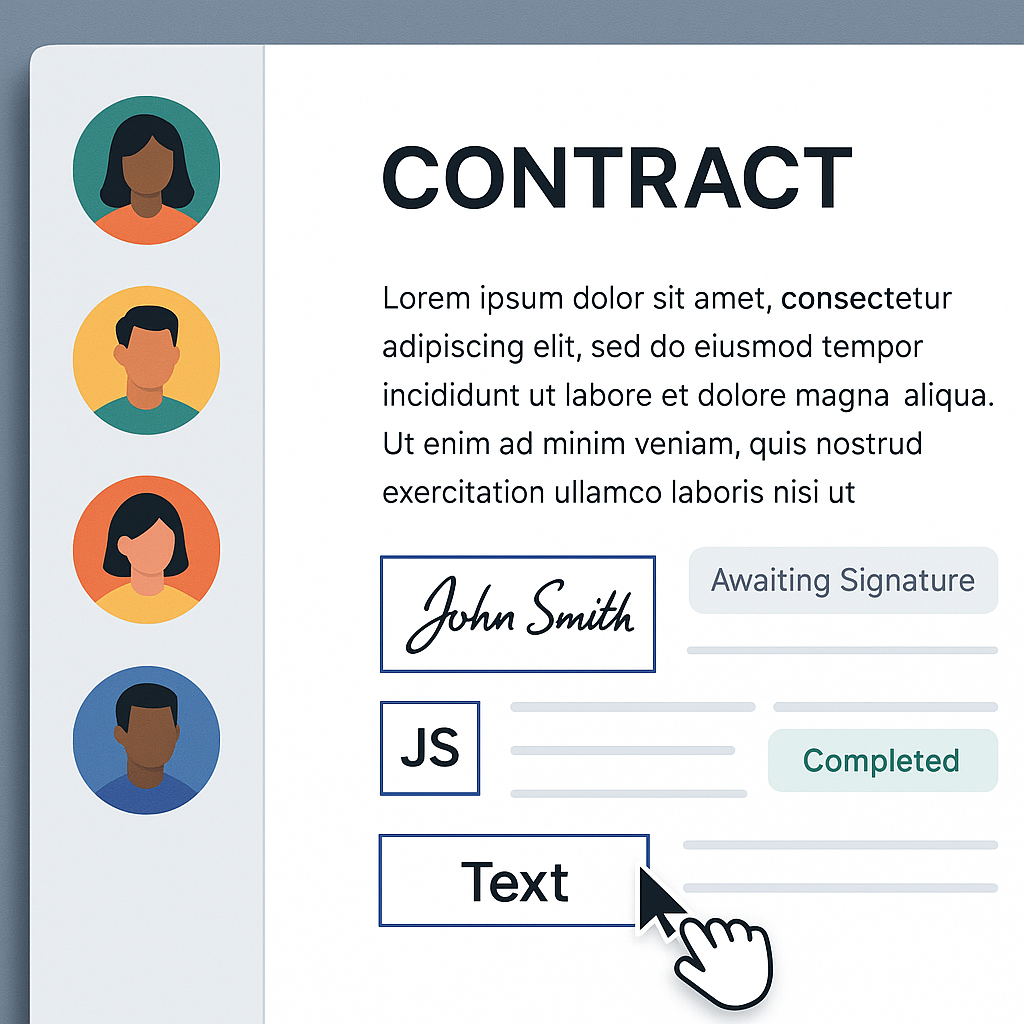
- Names and email addresses of your signers
Estimated setup time: 3–5 minutes for your first document, then under 60 seconds for future documents once you’ve saved templates.
Why Drag-and-Drop Signature Placement Matters
Drag-and-drop signature editors have become a standard expectation in modern e-signature tools because they dramatically cut down on errors like missing signatures, incorrect initials, or misplaced date fields. Studies show e-signatures can reduce contract processing time by up to 80% and save as much as $28 per document compared to paper workflows. (certinal.com)
QuickSign builds on these benefits with a highly visual, browser-based editor that works on any modern device. You simply drop fields where you want them—no need to manually edit PDFs or design complex forms.
Step 1: Sign Up and Log In to QuickSign
1.1 Create your free QuickSign account
Visit QuickSign.it and click the “Get started free” or “Sign up for free” button on the homepage. You’ll be asked for basic details like:
- Name
- Work email address
- Password
Once you confirm your email, you’ll land in the QuickSign dashboard, where you can start generating or uploading documents immediately. According to their site, QuickSign is designed so you can upload a document and add signatures “in seconds,” and all signatures are secure and legally binding. (quicksign.it)
1.2 Explore the dashboard layout
On the QuickSign dashboard, you’ll typically see:
- A primary action button like “Upload document” or “Generate with AI”
- A sidebar or top navigation with sections such as:
- Documents – all your drafts, in-progress, and completed agreements
- Templates – reusable contract layouts
- Settings – branding, team, and account options
Pro tip: Spend 1–2 minutes clicking around your QuickSign dashboard before your first send. Familiarity with the layout makes the drag-and-drop editing process much smoother.
Step 2: Create or Upload the Document You Want to Sign
2.1 Option A – Generate a contract with QuickSign AI
One of the most powerful differentiators of QuickSign is AI Document Generation. Instead of uploading a finished contract every time, you can describe what you need and let QuickSign draft it for you.
- In the dashboard, click “Generate Document” or “Generate with AI”.
- Enter a natural-language prompt describing your agreement, such as:
- “One-page services agreement for a small marketing agency hiring a freelance designer, fixed fee of $2,500, 30-day payment terms.”
- “Mutual NDA between a SaaS startup and an enterprise customer, 2-year term, Delaware law.”
- Select a document type if prompted (e.g., NDA, Service Agreement, Consulting Contract).
- Click “Generate”.
QuickSign’s AI will draft a complete, structured document that opens directly in the editor. You can skim the text, adjust clauses, and then move straight into drag-and-drop field placement.
Key benefit: AI Document Generation means you’re not just placing signatures—you’re generating the entire contract workflow in one place, saving significant drafting time for common docs like NDAs and service agreements.
2.2 Option B – Upload an existing PDF or document
If you already have a contract or form:
- From the dashboard, click “Upload document” or the “Upload to sign” section. (quicksign.it)
- Drag and drop your file into the upload area, or click “Browse” to select a:
- Word document
- Image file (PNG, JPEG) if necessary
- Wait a couple of seconds while QuickSign processes the document and loads it in the editor.
You’ll now see a preview of your document page-by-page, ready for field placement.
Step 3: Add Signers and Set Roles
Before placing fields, you should tell QuickSign who needs to sign. This makes it easy to assign specific fields to specific people during the drag-and-drop step.
- In the document setup view, find the “Recipients” or “Add signers” panel.
- Click “Add recipient” and enter:
- Signer’s full name
- Email address
- Role (e.g., “Client”, “Vendor”, “Employee,” or “You” for self-signing)
- If needed, set a signing order (e.g., you sign first, client signs second).
Once your recipients are added, their names (often color-coded) will appear in the field toolbar, so you can connect each field to the right person with a single click.
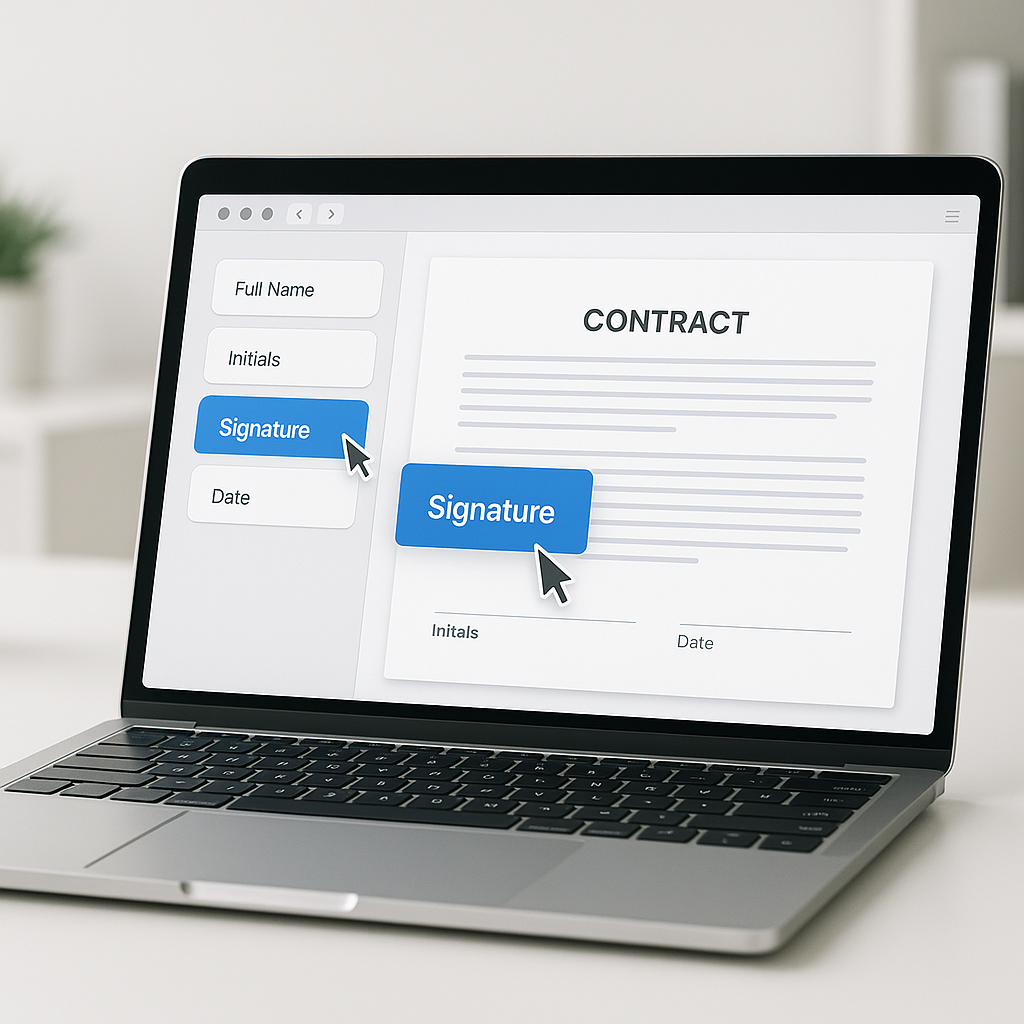
Step 4: Open the Drag-and-Drop Field Editor
QuickSign’s drag-and-drop editor behaves similarly to other intuitive design tools (and even things like digital note-taking or visual editors on tablets), where you grab elements from a side panel and place them directly on the page. The interaction is conceptually similar to drag-and-drop in creative apps you might be familiar with. (digitalhill.com)
- After uploading or generating your document, click “Prepare for signing” or you may be dropped into this screen automatically.
- You’ll see:
- The document preview in the center
- A fields toolbar on one side, with options like:
- Signature
- Initials
- Date
- Text (for name, title, or other details)
- Possibly checkboxes or dropdowns for forms
- A recipient selector that lets you choose which signer you’re placing fields for.
Key takeaway: Think of QuickSign’s editor as a “form builder on top of your PDF.” You’re not editing the underlying text—you’re simply placing the interactive fields that signers will complete.
Step 5: Drag and Drop Signature Fields Exactly Where You Need Them
5.1 Place the main signature field
- In the recipient selector, choose the first signer (e.g., Client).
- From the fields toolbar, click and hold the “Signature” field.
- Drag it onto the page and position it where the signer’s signature line should be (commonly above printed name or on the “Signature” line).
- Release your mouse to drop the field in place.
- Use the field’s resize handles (if available) to adjust width and height so it aligns perfectly with your layout.
5.2 Add initials fields for multi-page documents
If your agreement runs multiple pages and you want signers to initial each page:
- Select the signer again (e.g., Client).
- Drag an “Initials” field from the toolbar onto the footer or a designated initials area.
- Copy or repeat this initials field on each page:
- Either drag a new one onto each page, or
- Use any “Duplicate” or “Apply to all pages” options available in QuickSign to speed up placement.
5.3 Insert date and text fields
To ensure complete, error-free contracts, add fields for dates and any other required information:
- Drag a “Date” field and place it near the signature, e.g., “Date signed.”
- Drag a “Text” field for items like:
- Printed name
- Job title
- Company name
- For internal-use fields (like internal reference numbers), you can place text fields and mark them as “Optional” or “For internal use” where appropriate.
Pro tip: Use consistent placement (same vertical and horizontal alignment) for signatures and dates across your templates. This creates a clean, professional look that boosts client confidence and reduces confusion. Modern businesses report higher client satisfaction when they present clear, digital signing experiences. (signbulb.com)
5.4 Assign fields to multiple signers
For contracts requiring two or more parties:
- Switch the recipient selector to the second signer (e.g., Vendor or Your Company).
- Repeat the drag-and-drop process:
- Add Signature fields in their designated signature block.
- Add Date and Text fields as needed.
- Use color coding (if shown in the editor) to verify each field belongs to the correct signer.
This visual system dramatically reduces the chance of someone signing in the wrong place, one of the most common issues with manual or poorly configured digital workflows. (esignly.com)
Step 6: Fine-Tune Field Settings
Once your fields are placed, QuickSign lets you fine-tune behavior and validation rules.
- Click a field to open its Field Settings (usually in a side or floating panel).
- Adjust options such as:
- Required vs. optional – ensure critical fields like signatures and dates are mandatory.
- Field label – customize placeholder text like “Enter full legal name.”
- Validation – for text or email fields, you may be able to enforce formats.
- Read-only for certain recipients – for fields that one party fills and the other only views.
- Repeat this for any important fields you don’t want left blank or incorrectly filled.
Key takeaway: Smart field settings combined with drag-and-drop placement dramatically reduce errors and rework, helping you capitalize on the time and cost savings that digital signatures bring. (thanksroger.com)
Step 7: Preview the Signer Experience
Before sending, it’s helpful to see your contract exactly as each signer will see it.
- Click the “Preview” or “Preview as signer” button in the editor.
- Select which signer to preview (e.g., Client).
- Walk through the document:
- Confirm all required fields appear.
- Check that the signing order is clear and intuitive.
- Ensure there are no overlapping or misplaced fields.
- Exit preview to return to editing if you need to adjust anything.
Step 8: Send Your Document with QuickSign’s Seamless Sending
Once your fields are in place and configured, sending is straightforward.
- Click “Send for signature” from the editor.
- Review the Recipients list:
- Ensure each name and email is correct.
- Confirm signing order if you’re using sequential signing.
- Customize the email message if needed, e.g.:
- Subject: “Service Agreement for Your Review and Signature”
- Message: Brief summary of what they’re signing and any deadlines.
- Click “Send”.
QuickSign handles the secure email delivery and gives each recipient a unique signing link. Their homepage promotes that documents can be signed “in seconds,” and the platform manages email delivery and status tracking on your behalf. (quicksign.it)
Step 9: Track Views and Signatures in Real Time
One of the biggest advantages of using a modern e-signature platform is visibility. Instead of wondering “Did they see it?”, QuickSign provides real-time tracking so you always know what’s happening.
- Go to the Documents section of your dashboard.
- Locate the document you just sent. You’ll see a status like:
- Sent
- Viewed
- Signed
- Click into the document to see a more detailed activity log:
- When each recipient opened the email
- When they viewed the document
- When they completed the signature
These real-time insights help you follow up promptly, forecast deal closures, and keep your team aligned. Real-time visibility and status tracking are widely cited as core benefits of e-signature adoption because they eliminate the “black box” of traditional signing. (thanksroger.com)
Step 10: Save Your Drag-and-Drop Layout as a Template
If you send similar agreements regularly (e.g., sales contracts, NDAs, onboarding forms), you don’t want to repeat the drag-and-drop process every time. QuickSign’s templates feature lets you save your field placement and reuse it instantly.
- Open a fully configured document (with all fields placed).
- Click “Save as template”.
- Give your template a descriptive name like:
- “Standard Client Services Agreement – US”
- “Mutual NDA – Partner Version”
- Next time you need that agreement:
- Go to the Templates tab.
- Click “Use template”.
- Enter recipient details and send—no field placement required.
Pro tip: Build a small library of 3–5 templates for your most common contracts. Combined with QuickSign’s flat-rate pricing and AI generation, this can replace hours of manual document prep each week, especially for small teams handling repetitive agreements. (quicksign.it)
Related Visual Reference: Drag-and-Drop in Action
While the exact UI will differ, this short video demonstrates the basic concept of drag-and-drop signature fields in an e-signature context, similar to how you’ll work in QuickSign:
If you’re already comfortable with drag-and-drop in creative or productivity apps (for example, dragging images into notes apps or moving objects in visual editors), QuickSign’s document editor will feel immediately familiar.
Real-World Workflow Example with QuickSign
Use case: Small agency signing a new client
Imagine you run a small marketing agency and just closed a new client for a three-month retainer. Here’s how you might use QuickSign end-to-end:
- Generate the contract with AI: Click “Generate with AI” and describe the engagement (scope, monthly fee, three-month term).
- Review and tweak: Adjust any clauses to match your standard terms.
- Add recipients: Add your client contact and yourself as signers.
- Drag-and-drop fields:
- Place your signature and date on the final page.
- Place the client’s signature, date, and printed name fields beneath yours.
- Add initials fields on each page for both parties.
- Send for signature: Use QuickSign’s seamless sending to email the contract.
- Track progress: Watch as the client opens, reviews, and signs. If they stall, quickly see status in real time and follow up.
- Store & reuse: Save the layout as a template for future clients, so next time you only update names and fees.
This streamlined workflow illustrates how drag-and-drop field placement, AI Document Generation, and real-time tracking combine to create a fast, professional signing experience that scales with your business.
Quick Summary
- Set up QuickSign: Create your free account at QuickSign.it and open the dashboard.
- Create or upload your document: Either use AI Document Generation to draft a contract or upload an existing PDF/Word file.
- Add recipients: Enter signer names, emails, and roles so fields can be assigned properly.
- Use drag-and-drop fields: Open the editor and drag Signature, Initials, Date, and Text fields onto the exact spots required.
- Assign and validate: Ensure each field is tied to the right signer and set important fields as required.
- Preview the experience: Check the document from each signer’s perspective to catch any issues.
- Send in seconds: Use QuickSign’s seamless sending to deliver the document by email.
- Track in real time: Monitor when recipients open, view, and sign your documents.
- Save as template: Turn your fully configured document into a template to reuse the same drag-and-drop layout instantly.
Ready to simplify your document signing? Try QuickSign for free - generate 2 documents and send 1 document to unlimited recipients at no cost. No credit card required.