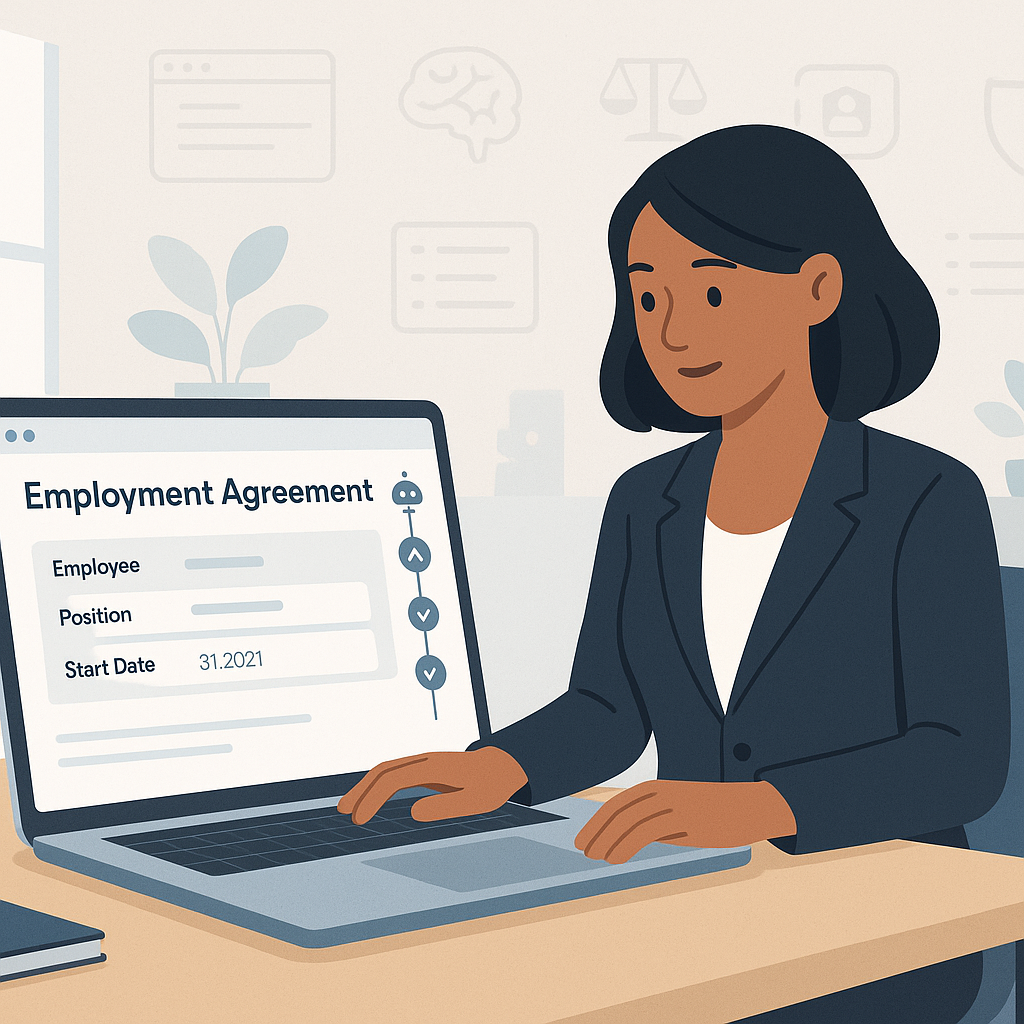
How to Generate Employment Agreements with AI (Step-by-Step with QuickSign)
Learn how to generate employment agreements with AI using QuickSign. Follow our step‑by‑step guide to create accurate, compliant contracts in minutes.
How to Generate Employment Agreements with AI (Step-by-Step with QuickSign)
Hiring is moving faster than ever. Your candidates expect offers in hours, not weeks—and your HR team doesn’t have time to manually rewrite every employment agreement from scratch. That’s where AI-generated contracts and modern e-signatures come in. With QuickSign, you can generate customized employment agreements, send them for signature, and track every step in one place—often in under 60 seconds.
In this guide, you’ll learn exactly how to generate employment agreements with AI inside QuickSign, how to send them for legally binding e-signatures, and how to reduce risk with smart review workflows.
Key takeaway: AI + e-signatures let you move from “we’ll send the contract next week” to “your offer letter is in your inbox right now.” Platforms with audit trails, tracking, and secure storage make this both fast and compliant. (blog.contractloom.com)
Why Use AI to Generate Employment Agreements?
AI contract drafting and e-signature tools are transforming how HR and operations teams work. Businesses that switch to electronic contracts typically execute agreements much faster, cut costs tied to printing and mailing, and gain better visibility through centralized digital storage and real-time tracking. (contractworks.com)
Business benefits of AI-generated employment agreements
When you generate employment agreements using AI inside a solution like QuickSign, you gain:
- Speed to hire: Draft, approve, and send agreements in minutes instead of days, helping you secure top candidates before competitors. (contractworks.com)
- Consistency: Use AI to start from standardized templates so every new hire receives a contract aligned with your policies.
- Lower admin costs: Eliminate printing, scanning, and mailing costs associated with paper contracts. (contractworks.com)
- Better employee experience: Candidates can review and sign their contracts digitally from any device. (apspayroll.com)
- Auditability & security: E-signatures create a traceable record of who signed, when, and what version they saw—critical for HR and legal teams. (blog.contractloom.com)
Why pair AI generation with e-signatures?
AI can help you create the agreement; an e-signature platform like QuickSign completes the loop by making it easy to:
- Place signature, date, and initials fields exactly where needed using drag-and-drop.
- Send to one or many recipients in seconds.
- Track opens, views, and completed signatures in real time, so HR knows exactly where things stand. (blog.contractloom.com)

What You’ll Need Before You Start
Set yourself up for a smooth workflow with these basics:
- A free or paid QuickSign account – The generous free tier lets you generate 2 documents and send 1 document to unlimited recipients, perfect for testing your hiring flow.
- Basic details about the role – Job title, start date, employment type (full-time, part-time, contractor), base salary or hourly rate, work location, manager name.
- Your standard HR policies – Any company-specific clauses (probation period, benefits eligibility, IP and confidentiality language) you want AI to include.
- Approval workflow – Decide who needs to quickly review AI-generated agreements (H
R lead, hiring manager, or legal counsel).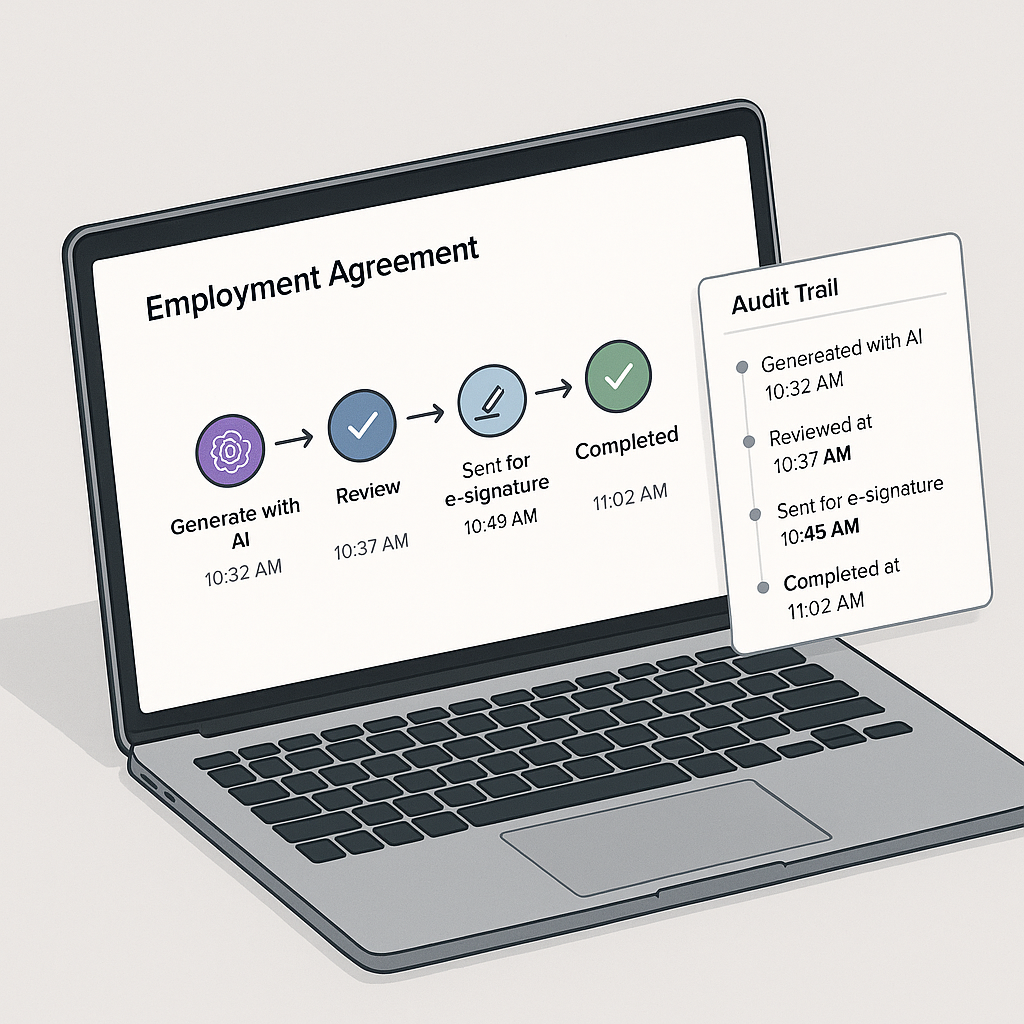
Estimated time: Once you’ve done this once, generating and sending a new employment agreement with QuickSign typically takes under 60 seconds.
Step 1: Log Into QuickSign and Start a New AI-Generated Agreement
First, sign into your QuickSign dashboard in your browser.
- Go to QuickSign.it and log in (or create a free account if you’re new).
- From the main dashboard, look for the “Generate Document” or “New AI Document” button in the top navigation.
- Click it to open the AI document generation panel.
You’ll see a prompt box where you can describe the employment agreement you need. This is where QuickSign’s AI Document Generation feature does the heavy lifting.
Crafting a strong AI prompt for an employment agreement
Good inputs produce better contracts. In the AI prompt field, include:
- Document type: “Create a full-time employment agreement” or “Create a contractor agreement.” (luminpdf.com)
- Jurisdiction (if you know it): “for an employee based in California, USA.”
- Key terms: Start date, salary, hours, remote/on-site, probation period, benefits, notice periods.
- Company policies: Any mandatory IP, confidentiality, or non-compete language (if legally appropriate in your jurisdiction).
Example prompt you might paste into the QuickSign AI generator:
Sample prompt: “Draft a full-time employment agreement for a Software Engineer based in California, USA. Start date is February 3, 2026. Base salary is $135,000 per year, exempt position, standard 40-hour week, hybrid schedule (3 days in office). Include sections for duties, at-will employment, probation period of 90 days, benefits eligibility, paid time off, confidentiality and IP assignment, and termination. Make it clear and professional, written in plain English.”
Paste your prompt, then click “Generate Document”. In a few seconds, QuickSign will produce a full draft employment agreement based on your instructions.
Step 2: Review and Edit the AI-Generated Agreement
AI is powerful, but it is not a lawyer. Recent high-profile cases have shown that blindly trusting AI output—especially for legal work—can introduce serious risks if you don’t review and verify the content. (apnews.com)
Inside QuickSign, your generated agreement will open in an editor for you to refine before sending.
- Read each section carefully: job title, compensation, benefits, confidentiality, IP ownership, termination, and dispute resolution.
- Edit any wording to match your internal HR policies and jurisdictional requirements.
- Confirm that all numbers (salary, bonuses, PTO days, notice periods) are correct.
- If possible, have your internal legal counsel review the text—especially the first time you design a template for a specific jurisdiction.
Pro tip: Treat AI as a first draft assistant, not a final authority. Use QuickSign’s AI Document Generation to save time, then rely on your HR and legal experts for accuracy and compliance.
Save reusable templates in QuickSign
Once you’ve edited an employment agreement to your satisfaction, you can reuse it:
- Save the agreement as a template in your QuickSign account.
- Next time, open that template and tweak only the candidate-specific details (name, salary, start date) instead of regenerating from scratch.
This lets you blend the speed of AI with the reliability of your vetted template library.
Step 3: Add Signature and Form Fields with Drag-and-Drop
Once your content is final, it’s time to turn the agreement into a signable document. This is where QuickSign’s drag-and-drop field placement comes in.
- From the editor, click “Prepare for Signature” or choose “Send for Signature” and select the just-created document.
- QuickSign will open a field designer with a preview of your agreement.
- In the left or right sidebar, you’ll see elements like:
- Signature
- Initials
- Date
- Text field (for additional info, such as employee address)
- Drag a Signature field to the line where the employee needs to sign.
- Drag a Date field beneath the signature line.
- If your company representative also signs, add their Signature and Date fields to the appropriate lines.
You can assign each field to a specific signer (e.g., “Employee” vs. “HR Manager”), ensuring the right person signs in the right place and that documents are not marked complete until all required fields are filled. (blog.contractloom.com)
Step 4: Add Recipients and Send for Signature in Seconds
Now you’re ready to send the agreement to your new hire. One of the major advantages of electronic signatures is the ability to complete contracts quickly—often in minutes—and from any location, without printing or scanning. (contractworks.com)
- Click the “Recipients” or “Add Signers” section in your QuickSign send flow.
- Enter the employee’s full name and email address.
- Add your internal signer (e.g., HR Director or CEO) if the agreement requires a countersignature.
- Optionally, set the signing order (for example, employee signs first, then HR).
- Customize the email subject and message to the candidate (e.g., “Your Employment Agreement with ACME Corp”).
- Click “Send for Signature”.
Unlike traditional per-seat solutions, QuickSign offers flat-rate pricing at $15/month for your whole team, so HR, operations, and hiring managers can all send employment agreements without worrying about adding more “seats.”
Step 5: Track Views and Signatures in Real Time
One of the biggest frustrations in hiring is not knowing where an offer stands. Did the candidate receive it? Have they opened it? Are they hesitating or just busy?
QuickSign solves this with real-time tracking and audit trails:
- Open your Dashboard in QuickSign.
- Go to the Documents or Sent tab.
- Find the employment agreement you just sent.
- View its status: Sent, Viewed, Signed, or Completed.
- Drill into the document to see a detailed timeline, such as:
- “Sent to jane.doe@example.com at 10:32 AM”
- “Opened by Jane Doe at 10:34 AM”
- “Signed by Jane Doe at 10:40 AM”
This visibility helps HR teams follow up with candidates at the right time and proves compliance by maintaining a secure, time-stamped audit trail. (blog.contractloom.com)
Pro tip: Use QuickSign’s status filters to quickly see all outstanding employment agreements so you can nudge candidates before their start date slips.
Step 6: Store and Reuse Agreements for Future Hires
Once the agreement is fully signed, QuickSign stores it digitally. Digital storage and centralized repositories make contracts easier to locate, search, and manage than paper files in cabinets. (apspayroll.com)
Best practices for HR teams using QuickSign:
- Create folders for each department or office (e.g., “Sales – US,” “Engineering – Remote”).
- Tag documents with labels like “Employment Agreement,” “Contractor Agreement,” or “Offer Letter.”
- Export or sync signed agreements to your HRIS, payroll, or document management system if needed.
- Periodically refresh your base templates using AI generation plus legal review to keep up with changes in your policies or applicable law.
Real-World Example: Onboarding a Remote Software Engineer with QuickSign
Here’s how a small tech company might use QuickSign end to end.
- HR receives acceptance from a candidate for a remote Software Engineer role.
- They open QuickSign, click “Generate Document”, and use a prompt similar to the sample above, specifying “fully remote, United States-based employee.”
- QuickSign’s AI generates a full employment agreement in seconds.
- HR tweaks benefits language and ensures IP and confidentiality clauses match the company’s standard wording.
- They save this as a “US Remote Engineer” template for future hires.
- Using drag-and-drop, they place signature and date fields for both the employee and CTO.
- They add the candidate and CTO as recipients, set the CTO as the second signer, and click “Send for Signature”.
- The candidate receives the email, opens the agreement on a laptop at home, signs electronically, and the CTO is automatically notified to countersign.
- Within an hour, the agreement is fully executed, stored in QuickSign, and HR can forward a copy to payroll for setup.
All of this happens without printing a single page, and HR retains a complete digital record and timeline of the signing process.
Helpful YouTube Resources About AI Contract Generation
To deepen your understanding of AI-generated contracts and how they fit into your HR tech stack, these videos provide helpful context and examples:
Beginner-friendly overviews of AI and AI agents
This “AI Agents Explained” video walks through how AI systems can automate multi-step processes—similar to how AI document generation in QuickSign automates the drafting stage before e-signature.
Examples of AI-generated employment agreements and contracts
This video shows the process of creating an employment agreement with AI in minutes. While it uses a different tool, the workflow is conceptually similar to how you’d generate and refine agreements in QuickSign—describe what you need, review and edit, then send for signatures.
This “How to create a contract using AI” tutorial reinforces the importance of clear prompts and careful review—both core to using QuickSign’s AI Document Generation safely and effectively.
Best Practices and Legal Considerations
As AI adoption in legal and HR workflows accelerates, regulators and courts are scrutinizing how organizations use these tools. Misuse—like submitting AI-generated text without verification—has led to sanctions in several cases. (reuters.com)
Keep your use of QuickSign responsible with these guidelines:
- Always review AI drafts: Never send an AI-generated employment agreement without human review by HR and, where appropriate, legal counsel.
- Standardize where possible: Use AI to help create your initial templates, then lock in standardized versions for day-to-day hiring.
- Respect local laws: Employment law varies by country and state; tailor your agreements accordingly and seek legal advice when expanding into new jurisdictions.
- Use secure, reputable platforms: Choose tools (like QuickSign) that prioritize encryption, audit trails, and compliance-friendly workflows. (blog.contractloom.com)
Remember: AI should augment your HR and legal teams, not replace them. The organizations that win will be the ones that combine automation with strong oversight and clear policies. (reuters.com)
Quick Summary: Generating Employment Agreements with AI in QuickSign
- Prepare: Gather role details (title, salary, start date, location) and your standard HR policies.
- Step 1 – Generate: Log into QuickSign, click “Generate Document”, and describe the employment agreement you need in a clear prompt.
- Step 2 – Review: Carefully edit the AI-generated draft and, when possible, have legal review your base templates.
- Step 3 – Add fields: Use drag-and-drop to place signature, date, and initials fields for each signer.
- Step 4 – Send: Add recipients, customize the email, and send the agreement for signature in seconds.
- Step 5 – Track: Use real-time tracking in QuickSign to see when candidates open and sign their agreements.
- Step 6 – Store & reuse: Save finalized templates, organize signed documents, and reuse your best agreements for future hires.
Ready to simplify your document signing? Try QuickSign for free - generate 2 documents and send 1 document to unlimited recipients at no cost. No credit card required.