Small Business Document Signing Guide: How to Streamline Contracts with QuickSign
Streamline deals with our small business document signing guide. Learn how QuickSign simplifies contracts, speeds approvals, and boosts client confidence.

Small Business Document Signing Guide: How to Streamline Contracts with QuickSign
Why Small Business Document Signing Needs an Upgrade
If you run a small business, you probably spend more time than you’d like chasing signatures on contracts, proposals, NDAs, and invoices. Paper documents and email attachments slow everything down, cost money, and make it hard to track who has signed what.
Modern e-signature tools solve this. Businesses using e-signatures report faster time-to-revenue, higher ROI and cost savings, and improved security compared to paper-based workflows.(fujifilm.com) For small businesses operating on tight margins, that matters.
This is where QuickSign comes in. QuickSign is a modern, affordable e-signature platform designed to help you generate, send, and track legally-binding documents in minutes — without legal or technical expertise.
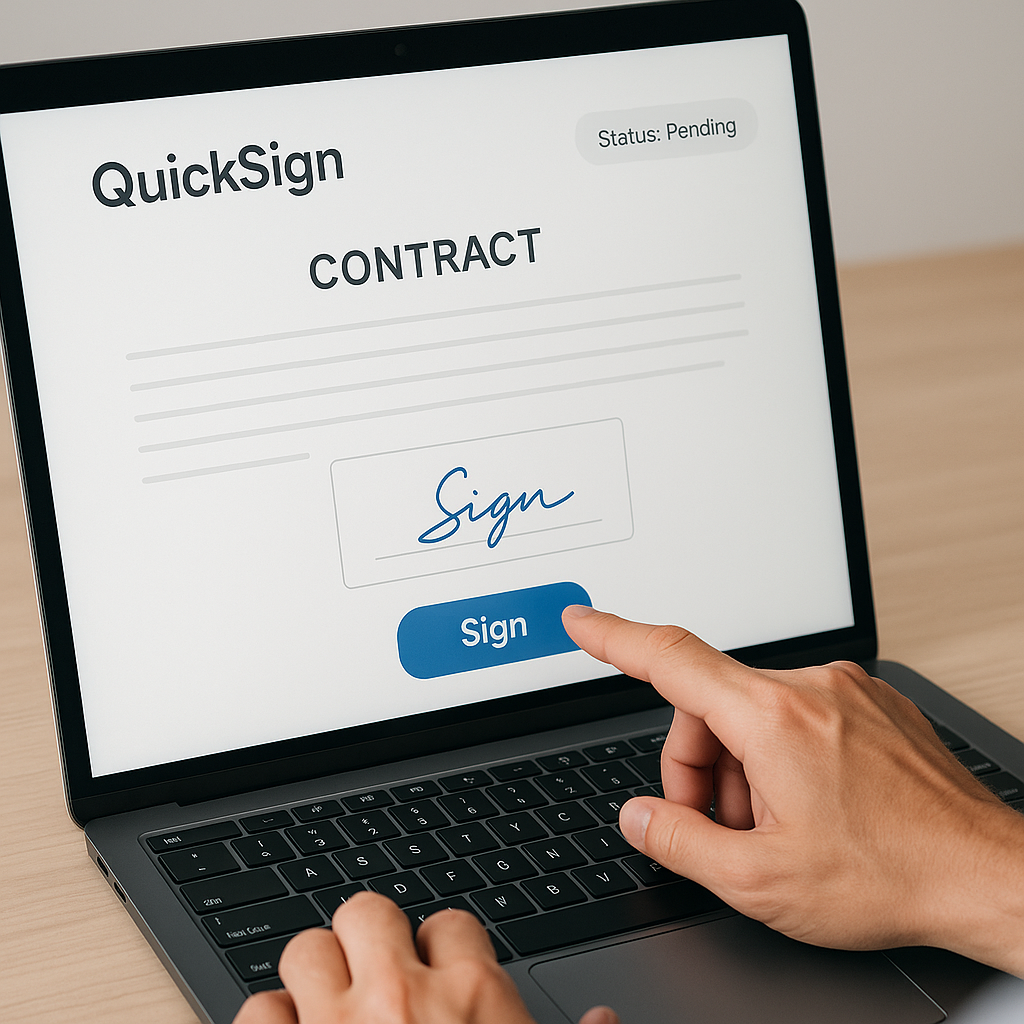
Key idea: With QuickSign, you can go from “I need a contract” to “fully signed document” in under 60 seconds, especially when you use its built-in AI Document Generation.
Legal Basics: Are E-Signatures Valid for Small Businesses?
In the United States, electronic signatures are broadly valid and enforceable thanks to two key legal frameworks: the ESIGN Act (federal) and the Uniform Electronic Transactions Act (UETA) (state-level). These laws state that a signature cannot be denied legal effect just because it’s electronic.(helpx.adobe.com)
For an e-signature workflow to be legally robust, best practice is to ensure:
- Intent to sign – the signer clearly chooses to sign (e.g., clicks a labeled “Sign” or “Accept” button).
- Consent to do business electronically – they accept that the transaction will be electronic.
- Association of the signature with the record – you can show which signature belongs to which document.
- Record retention – signed records can be accurately reproduced and stored.( _source=openai" target="_blank" rel="noopener noreferrer">helpx.adobe.com)
QuickSign is designed with these principles in mind. The platform associates each signature with a specific document, captures clear signer actions, and stores completed PDFs for reliable record-keeping.
What You’ll Need Before You Start
To follow this small business document signing guide with QuickSign, you’ll need:
- A QuickSign account (free tier available).
- A list of documents you need signed (e.g., client contracts, NDAs, invoices, employment agreements).
- Names and email addresses of signers (clients, partners, contractors, employees).
- About 10–15 minutes to set things up the first time; after that, each send typically takes under 60 seconds.
New to document workflows in general? These YouTube tutorials provide helpful background on contracts, LLC formation, and invoices (you’ll handle the actual signing with QuickSign):
Step 1: Choose the Right Document for E-Signature
Start by mapping which documents in your business should be signed electronically. Common small business use cases include:
- Client service agreements and proposals
- Non-disclosure agreements (NDAs)
- Freelance / contractor agreements
- Sales contracts and order forms
- Rental or equipment leases (where permitted)
- Onboarding documents (offer letters, policy acknowledgements)
- Invoices that require approval
Some documents — like wills, family law matters, or certain UCC filings — may have special rules or exclusions under U.S. law and often aren’t well-suited to basic e-signature workflows.(helpx.adobe.com) When in doubt, consult an attorney.
Pro tip: If a document doesn’t require a notary and you’d normally sign it on paper, there’s a good chance you can streamline it with QuickSign.
Using QuickSign’s AI Document Generation When You Don’t Have a Template
One of the biggest challenges for small businesses is not having a lawyer-drafted template ready. That’s where QuickSign stands out with its AI Document Generation feature.
- Log into your QuickSign dashboard.
- Click the “Generate Document” button in the top navigation or main dashboard.
- In the prompt box, describe what you need, for example:
- “A one-page service agreement for my marketing agency, monthly retainer, cancel anytime with 30 days’ notice.”
- “Mutual NDA between my LLC and a freelance developer, governed by California law.”
- Click “Generate”. QuickSign’s AI drafts the full contract for you.
- Review the draft, edit any clauses directly in the editor, and save it as a reusable template.
Unlike traditional tools that only let you upload existing PDFs, QuickSign actually helps you create the underlying legal document from scratch using AI, so you’re not starting from a blank page every time.
Step 2: Create or Upload Your Document in QuickSign
Option A: Generate a New Contract with AI (Fastest)
If you followed the previous subsection, you may already have a generated document. To recap in brief:
- From the dashboard, click “Generate Document”.
- Describe:
- The type of document (e.g., client contract, NDA, contractor agreement).
- The key terms (payment amount, scope of work, term length, jurisdiction).
- Click “Generate” and let QuickSign build the draft.
- Use the built-in editor to polish specifics like names, dates, and scope.
- Click “Save & Prepare for Signing” when you’re done.
Option B: Upload an Existing PDF or Document
If you already have a contract template from your attorney or accounting system, you can upload it directly:
- On the QuickSign dashboard, click “Upload Document”.
- Drag and drop your PDF or click “Browse” to select it from your computer.
- Wait for QuickSign to process the file and display a document preview.
- Click “Prepare for Signing” to move into the field placement screen.
Pro tip: Keep your master legal templates in your cloud drive, but use QuickSign as the single place where you upload, prepare, and send sign-ready versions. This keeps your signing workflow clean and simple.
Step 3: Add Signature and Form Fields with Drag-and-Drop
Once your document is in QuickSign, you need to tell the system where each signer should sign, initial, or fill information. QuickSign’s drag-and-drop field placement makes this intuitive.
- In the Field Editor view, look to the right-hand panel labeled “Fields”.
- Drag a “Signature” field onto the appropriate signature line.
- Drag “Initials”, “Date”, and “Text” fields wherever required (e.g., for job titles, company names, or dollar amounts).
- Assign each field to a specific signer using the small dropdown above or beside the field (e.g., “Client,” “Your Company”).
- Scroll through the document to make sure every signature block has:
- A signature field
- A printed name text field (if needed)
- A date signed field
- Click “Next: Add Recipients” when done.
Because this is fully visual, you don’t need to be technical — you simply drop fields exactly where you’d place ink on paper.
Step 4: Add Recipients and Send for Signature
This is where your document turns into a live, trackable signing workflow.
- On the Recipients screen, click “Add Recipient”.
- Enter the signer’s:
- Name (e.g., “Jane Doe”)
- Email (e.g., “jane@example.com”)
- Role (Client, Contractor, Co-founder, etc., if you use roles)
- For multi-party agreements, repeat for each signer (QuickSign supports sending to unlimited recipients per document, even on the free send).
- Choose the signing order if needed:
- Sequential – one signer after another (e.g., client signs, then internal approver).
- Parallel – everyone can sign at the same time.
- Customize the email subject and message (for example, “Please sign your service agreement with Acme Studio”).
- Click “Send for Signature”.
This entire process — from document ready to fully sent — typically takes under 60 seconds once you’ve set up your templates. That’s a major time-saver compared to printing, scanning, and emailing PDFs back and forth.
Pro tip: Save frequently used recipient groups (e.g., “New Client,” “New Hire”) in QuickSign so you can send standard agreements to the right people with just a couple of clicks.
Step 5: Track, Remind, and Close Deals Faster
One of the overlooked benefits of modern e-signature platforms is visibility. Instead of wondering “Did they see my email?”, you can track every key event.
Using QuickSign’s Real-Time Tracking
QuickSign provides real-time tracking so you always know where a document stands.
- Open your “Documents” or “In Progress” tab from the dashboard.
- Click any document to see its status timeline, including:
- Sent – timestamp of when you sent it.
- Viewed – when each recipient opened the document.
- Signed – when each recipient completed their signature.
- If a signer hasn’t acted, click “Send Reminder” to nudge them automatically.
Studies show that businesses using e-signatures experience faster turnaround times and fewer incomplete forms,(fujifilm.com) and QuickSign’s real-time tracking is a big part of how you achieve that.
Downloading and Storing Signed Documents
Once everyone has signed:
- Open the completed document from the “Completed” or “Signed” tab.
- Click “Download Signed PDF” to save a copy locally.
- Optionally, click “Copy Link” to share a secure viewing link with internal stakeholders.
- Keep the signed copy stored in QuickSign as part of your digital archive — this supports record retention best practices and helps you prove the contract’s integrity if ever needed.
Key takeaway: Real-time tracking plus automatic archiving means you always know the status of your deals and can find any signed document in seconds.
Step 6: Automate Common Small Business Workflows
Once you’re comfortable sending one-off documents, the real power comes from turning your most common documents into reusable QuickSign workflows.
Example 1: Client Onboarding for a Service Business
Imagine you run a marketing agency, design studio, or consulting firm. Your client onboarding might look like this:
- Use AI Document Generation in QuickSign to draft a standard service agreement with your typical terms.
- Convert it into a template with pre-placed signature and date fields.
- For each new client:
- Open the template.
- Update client name, scope, and fees.
- Add the client as a recipient and send for signature.
- Track signature in real time and automatically move to kickoff once “Signed.”
Example 2: Contractor and Freelancer Agreements
If you work with freelancers or 1099 contractors:
- Generate a contractor agreement using QuickSign’s AI or upload one from your attorney.
- Set up fields for:
- Contractor name and business name
- Project description or role
- Rate and payment terms
- Signature and date for both parties
- Each time you hire a contractor, duplicate the template, update only the unique fields, and send for signature.
Example 3: Invoice Acknowledgements and Payment Terms
Some small businesses like to have customers sign invoices or payment plans. After you build your invoice using your preferred accounting or spreadsheet tool (like in the invoice tutorial video above), you can:
- Export the invoice as a PDF.
- Upload it into QuickSign.
- Add a simple signature field under “I agree to the payment terms above.”
- Send it for signature and track when the customer accepts.
Pro tip: Group related documents (proposal + contract + initial invoice) into a simple workflow in QuickSign so your client experiences a single, clean signing sequence.
Pricing and Why QuickSign Fits Small Business Budgets
E-signature tools can get expensive, especially if they charge per user. That’s painful for small teams and growing businesses.
QuickSign is built to be small-business friendly:
- Generous free tier – generate 2 documents with AI and send 1 document to unlimited recipients at no cost. Perfect for testing your core workflows.
- Flat-rate pricing – just $15/month for the whole team, with no per-seat fees.
- Unlimited recipients – you’re not penalized for multi-signer workflows.
Unlike traditional per-seat solutions, QuickSign offers flat-rate pricing at $15/month, making it predictable and affordable as you grow.
Security, Compliance, and Best Practices
Small businesses often worry whether e-signatures are “safe enough” for serious contracts. In practice, e-signatures often increase security versus paper by adding audit trails, access control, and encrypted storage.(fujifilm.com)
Best Practices When Using QuickSign
- Verify signer emails – always confirm you’re sending to the correct address to avoid misdirected contracts.
- Use clear subject lines – e.g., “Please Sign: Service Agreement with [Your Company], Due [Date].”
- Standardize your templates – use QuickSign’s AI generation and save templates so every client gets consistently worded terms.
- Store documents centrally – use QuickSign as the single source of truth for signed contracts instead of scattered email attachments.
- Consult counsel for edge cases – for unusually high-value or regulated transactions, ask your attorney to review your templates.
Quick Summary: Small Business Signing Workflow with QuickSign
- Decide what to sign electronically – identify contracts, NDAs, invoices, and agreements suitable for e-signature.
- Create your document – use QuickSign’s AI Document Generation to draft from scratch or upload an existing PDF.
- Place fields with drag-and-drop – add signature, date, text, and initials fields exactly where they’re needed.
- Add recipients and send – enter signer emails, set signing order, customize the message, and click “Send for Signature”.
- Track in real time – watch who has viewed and signed, send reminders, and download the fully executed PDF.
- Turn workflows into templates – standardize client onboarding, contractor agreements, and invoice approvals so each new send takes under a minute.
- Scale affordably – use QuickSign’s free tier to get started and upgrade to the flat-rate $15/month plan when you’re ready to roll it out to your whole team.
Ready to simplify your document signing? Try QuickSign for free - generate 2 documents and send 1 document to unlimited recipients at no cost. No credit card required.